Preparation and Material Procurement
-
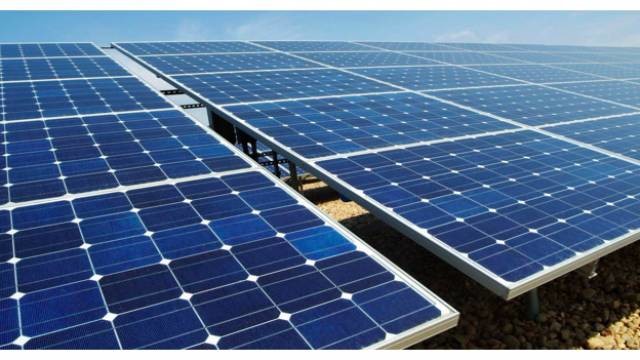
If you ever though of installing 400W monocrystalline solar modules on your roof, you have to plan the process carefully and acquire all the equipment beforehand. Make sure you * . The average per solar panel in this category is about 1.6 square meters , then your space should be at least five square meters if you do not have any obstructions on your roof, like chimneys or vents, your solar modules are going to fit perfectly.
-
It is necessary to acquire high-quality monocrystalline solar panels and a mounting system that is compatible with your roof. Depending on the roofing materials, the mounting system will vary for shingles, tiles, and metal. The system must include rails, clamps and brackets. For a standard 6 kW system, the number of panels you will need is approximately 15.
Tools and Equipment
-
Acquire all the necessary tools. In order to successfully install solar panels, you have to have a drill, sockets, wrenches, tape measure, level and studs finder. Safety equipment is vital, so you will need gloves, safety glasses, and a harness, if your roof is rather steep. A ladder is going to be useful for the work; do not forget to calculate the correct length. The ladder should be tall enough to reach over the roof. Solar Panel Layout
-
Create the layout of your solar panels. It is important to make sure that they receive the most amount of sunlight. However, you will also have to adhere to the local building code, which often requires a specific distance between solar modules and roof edges. You could also use a compass or a solar pathfinder to determine the direction for the sunlight and an angle at which the screw should be attached. The angle should also vary depending on where you live, so take this peculiarity into the account.
Proof of license
-
Contact your local city or county building department to learn more about the permit process. * Most of the localities require a building permit for solar installations. You may also need to submit a set of plans, where you also include layout and electric wiring diagrams. Finally, you may want to double-check whether the electrical system and attaching is up to code and subject to continuous inspection.

Inspect the Roof Before Installation
Before you can start installing 400W monocrystalline solar panels , thoroughly inspect your roof. Evaluate its structural integrity since every panel usually weighs around 50 pounds. In case the roof has any cracks or missing titles, conduct the necessary repairs. Assess your roof’s condition and determine its suitability to avoid any future complications.
Checking for adequate space
Assess your roof to find out if there is enough space. In general, one monocrystalline panel requires around 21.5 square feet of space. Moreover, it is essential to measure your roof to ensure there will be enough room for all the solar panels you want to install. On the one hand, you should not have any free space on the other side too. Thus, you need to consider all obstacles on your roof, such as a satellite dish or a vent, and ensure there is enough merchandise.
Reviewing sunlight exposure
It is critical to understand what areas of your roof receive sunlight all day long. Both sides of the roof should have limited shading from trees or neighboring houses. If there are chimneys, consider them as well. Finally, you should avoid the areas falling under the shadow of other buildings and structures as the lack of sun exposure might reduce the solar energy gain.
Deciphering the orientation and angle
On the one hand, as you try to establish suitable orientation, remember that in the Northern Hemisphere, solar panels installed on the roof must always face south. On the other hand, if it is impossible to directly direct the panels to the south, the installation is allowed for both east and west inherent roofs. However, over time the year and in the general perspective, it would be less effective. The angle of the roof can also influence the performance to some extent. The optimal tilt ranges from 25 to 35 °, depending on your latitude. If the tile of your roof does not reach the desired rate, use mounting systems to adjust the slope.
Install Solar Modules
When you opt to install 400W monocrystalline solar modules on your roof, you must be precise in every movement to guarantee safety and efficiency. Consequently, you should begin by layout out all hardware: panels, mounting brackets, rails, bolts, and grounding system. This preparation work is the key to smoothed installation.
Secure the Mounting Equipment
In the first instance, you should attach the mounting brackets to your roof. Using a stud finder, locate rafters beneath the roofing material as they will provide you with the best attachment points. Further, ensure the brackets are spaced according to the panels’ dimensions and your mounting system’s requirements: usually, you should place them around four feet from one another. Subsequently, fasten the rails to the brackets with the bolts provided in the package. Use a level to guarantee that the rails are entirely horizontal, as it is essential for maintaining the panels’ alignment and the installation’s overall structural stability.
Mount the Solar Panels
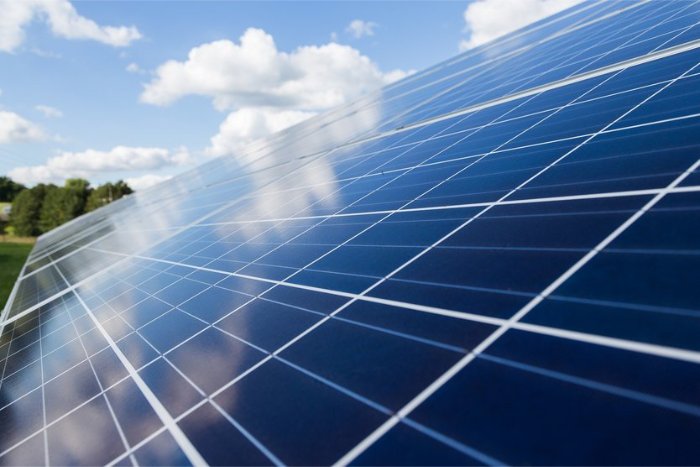
Once the rails are in place, you can mount the solar panels themselves. Simply lift each panel onto the roof and secure it to the rails with the clamps provided in the installation package. Further, tighten every connection as much as possible, ensuring the panel’s stability and safety from wind and weather. Finally, it is vital to connect the panels to the grounding system to prevent the installation from electrical surges.
Connect the Electrical Components
The final step is connecting the solar panels to each other with the help of electrical connectors that should also be provided in your installation package. Subsequently, align the wiring so it runs from the panels to the power inverter. This device will transform the direct current generated by your panels into an alternate current that can be used freely in your house . It is also vital to ensure that every connection is secure and able to resist bad weather and any moisture. Thus, you should check every connection at least twice, guaranteeing that it is tight and aligned correctly.
Electrical Connection and System Configuration
- Now that your 400 w monocrystalline solar panels are in place on your roof, the next crucial step is to make the electrical connections and set up the system to start generating power. This step requires careful attention to detail as well as adherence to safety precautions to guarantee that your system is operating efficiently and safely throughout.
Wiring the solar panels
- Start by connecting the solar panels in series or parallel according to your voltage and amperage specifications. When connecting them in a series, link the positive terminal of a panel to the negative terminal of the next panel. This will add the voltages of the two panels. Since most systems operate on a 24V input requirement, use a series connection to meet this requirement. You must ensure all the connectors are securely attached. This will prevent loss of power and reduce the risk of electrical fires.
Installation of the solar inverter
- The solar inverter is a key component of your system, as it is used to convert the DC electricity being produced by the panels into AC electricity, which can be used in your home’s electrical system.install the inverter as close as possible to the roof, which should be under 10 feet. This is to ensure minimum loss of energy in the long cable runs. Use the appropriate cable gauge to connect the output from the solar panel array to the input of the inverter. you must make certain all the connections are securely attached and properly insulated.
Setting up the battery storage system
- If you have a battery storage installation, install the batteries in a cool, well-ventilated area to ensure they do not overheat, which will extend their life span. Now connect the batteries to the inverter in order to use them when the panels are not producing power, which will be at night time or when the sky is overcast. you must use fuses or circuit breakers between the components in your system to protect against overcurrent.
Connecting the system to your home’s electrical panel
- Take the output from the inverter and connect it to your home’s electrical panel. This should be done in accordance with the local regulations regarding electrical connections, and as with setting up the solar system in general it is best done by a professional electrician Once again, the connection should include a switch that can isolate the solar system from the grid in case of an emergency or during maintenance.
Finally, you must now test the system before final activation . Disconnect the output from your panels and measure the voltage and current. then disconnect the inverter from the batteries and measure the voltage and current that the inverter is providing. You should then gradually turn the system on. You should not turn all the components at once. Start by turning the panels and paying attention to their input to the inverter. Turn the batteries on next and measure their output to the inverter, and afterwards turn the inverter on and measure the voltage and current that is being produced . If you notice that anything is off, you should immediately turn the system off.
Follow-up Maintenance and Monitoring
Once your 400W monocrystalline solar panels are set up and up and running, maintenance and monitoring measures must be arranged to keep the performance and ensure the long life of the system. They help you to keep your system in an optimal state and protect your from potential failures.
Regular Cleaning of Panels
Solar panels work best when clean, so make sure to check and clean them at least twice a year. if you have a dusty climate or many birds in your area, it would be wise to increase the frequency of the checks. Use a soft brush and soapy water to clean the surface and remember that the use of strong chemicals is prohibited, as they might scratch the surface of the panels.
System Performance Monitoring
Install a monitoring system to track the work of your solar panels. A smart digital system comes with the most modern type of solar panels and can be accessed through the apps or websites. Monitor the daily output of your system and make sure that everything is working fine. If the power output drops significantly, your panels or the inverter might need help.
Inspecting and Tightening Connections
Check your electrical connections every year to make sure they are tight and corrosion-free. Any loose or rusted connections can make your system less efficient and increase the risk of the fire. Also, arrange the wiring in a way it is safe and dust-proof.
Checking Inverter and Storage Systems
Do not forget to check your inverter and, if you have one, a battery storage system to see if they are in order. They have to display accurate information, and the indicator lights must not be signaling any error. In addition, test your battery charge to see if they are optimal, and the batteries do not leak or bulge.
Professional Inspections
While much of the maintenance can be done by the homeowner, a professional inspection is advised to be arranged every few years. Certified technicians can check the components that are hard to access for the homeowners at your own and conduct a quality review to secure your firm complies with the local electrical code.


