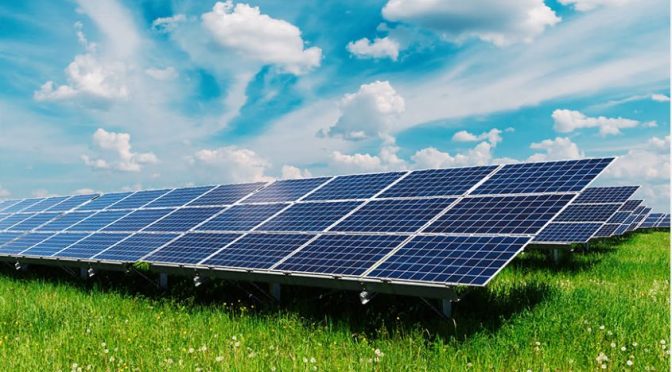
Choosing The Right Location
It is crucial to select the right location if you want your mini solar system to work in order. The spot has to have at least 6 hour of direct sunlight for high quality. Another report from the Solar Energy Industries Association underscores that in regions such as Southern California and Arizona, developers are positioned to not only exceed 5.5 kWh/m² per day, but also receive optimal solar irradiance types. Incorporate the use of solar pathfinder or similar tools to map the sun trajectory across your property for minimum shading during different times of the year.
Selecting Your System
The solar system size needs to be appropriate to feed the electricity demands from a solar panel system. A typical U.S. household uses approximately 877 kWh per month, the U.S. Energy Information Administration notes. If we apply to such homes, system size around 4 kW should be enough which equals 10 to 15 panels. Do not forget to take into account the efficiency of the panel, which is largely between 15 and 20 for most residential solar panels, and make sure to select a system that is the best combination of costs and production possible.
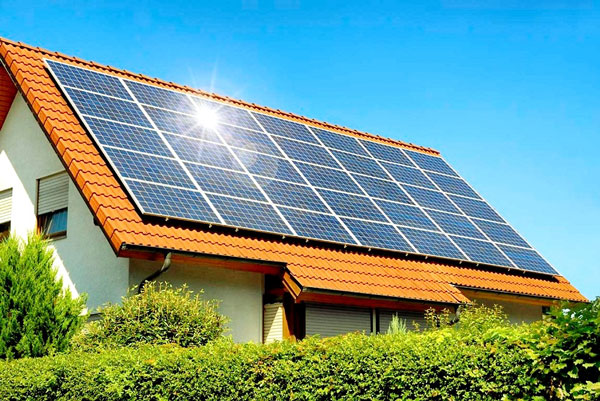
Installing Mounts
Properly Installed Mounts Make Stable Panels Your solar panels will only be as stable as the mounts they are installed on. The mounts should face south in the Northern Hemisphere and be angled 30 to 45 degrees. Research from the National Renewable Energy Laboratory indicates that this version increases solar capture while maximizing energy generation. Ensure that the roofing material will hold the mounts (most residential roofs can support the weight but it never hurts to ask a structural engineer)
Panel Installation
Secure Installation- As it is going to be installed in the open, it is very important to install solar panels in a robust and secure manner. Screw the mounts of the panels that have been connected just as the mounts that have been pre-installed then fasten them well with nuts and bolts. Improper installation can cause a 25% loss of efficiency, according to an industry report. You should test each panel to make sure it has been properly connected and is working before moving on to the next one.
Electrical Connections
Wiring High and Low Voltage The most tricky part about the wiring from your panels to an inverter is the conversion from the DC electricity the panels produce to the AC power you are going to use in your home. Inverter shall be located near the main panel to minimize power loss. Electrical connections need to be done per NEC specification and it is a good idea to involve a certified electrician on this step.
System Maintenance
Your system will have a long life and it will work well with regular maintenance. This not only includes making sure to hiss the panels down at least twice each year, taking a close look to ensure that a large pile of dead leaves or other debris have not accumulated and caused a shadow to keep the system from functioning correctly, but also checking the wiring for any signs of a worn connection on a regular basis. According to a report by the Department of Energy, a solar system can retain as much as 95% of its efficiency (depending on how well the system is maintained) and for up to 20 years! So constant monitoring of system outputs to catch problems early
Choosing Solar Panels and Inverters
Using the best solar panels and inverters ensure the performance and longevity of your mini solar system. Both the panel efficiency as well as the inverter size must match your power requirement and also the local climate.
Panel Selection
Efficiency - for solar panels, varies between 15% to 22% in general })(sizes). Areas that Lack Space - These areas require high-efficiency panels. In 2022, the National Renewable Energy Laboratory reports that monocrystalline silicon panels are the most efficient and best for residential home use. You should evaluate your roof space like if you live in U.S. then a typical monthly electricity bill in the US is about 877kWh, and select a panel size and quantity that fits within your available space and meets your average electricity requirement.
Inverter Selection
An inverter changes the DC power produced by solar panels into AC power that you can use in your home. String vs Microinverters An example of the first are the string inverters and the perfect micro-inverter condition are the second being ideal suited with partial shading and high with complex roof shapes. For example, the Solar Energy Industries Association claims microinverters can boost energy yield by as much as 15% in partially shaded conditions,if configured to do so, over a string inverter.
Match System Size Using Energy Needs
The total wattage of the solar panels should be matched to the capacity of the inverter. This home installation example (typical 4 kW) would require an inverter capable of collecting at least 4400 watts (adding 10% buffer to handle peak spikes). This form of matching insures minimal energy loss, and maximal system efficiency.
Compatibility & Warranty Thoughts
Opt for quality panels and inverters from manufacturers you trust, who offer decent warranties and solid customer service. The average warranties for solar panels and inverters are 25 years and 10-15 years, respectively. These warranties help a lot in safeguarding your investment and also assures assistance if you face any technical issue.
Importance of Certification
Make sure the panels and inverters are certified by international standards such as the IEC (International Electrotechnical Commission). This certification helps them to show that the products are more durable and secure, which is also crucial for the system to be safe for public use.
Professional Advice
As with any solar project you should consult professional solar installer and select the right type of panels, inverters and their size to suit your individual needs. The best way to know that you are getting the most efficient and up to date gear and are in the best hands is by being guided by a professional installer who is immersed in the trends and technology of the market.
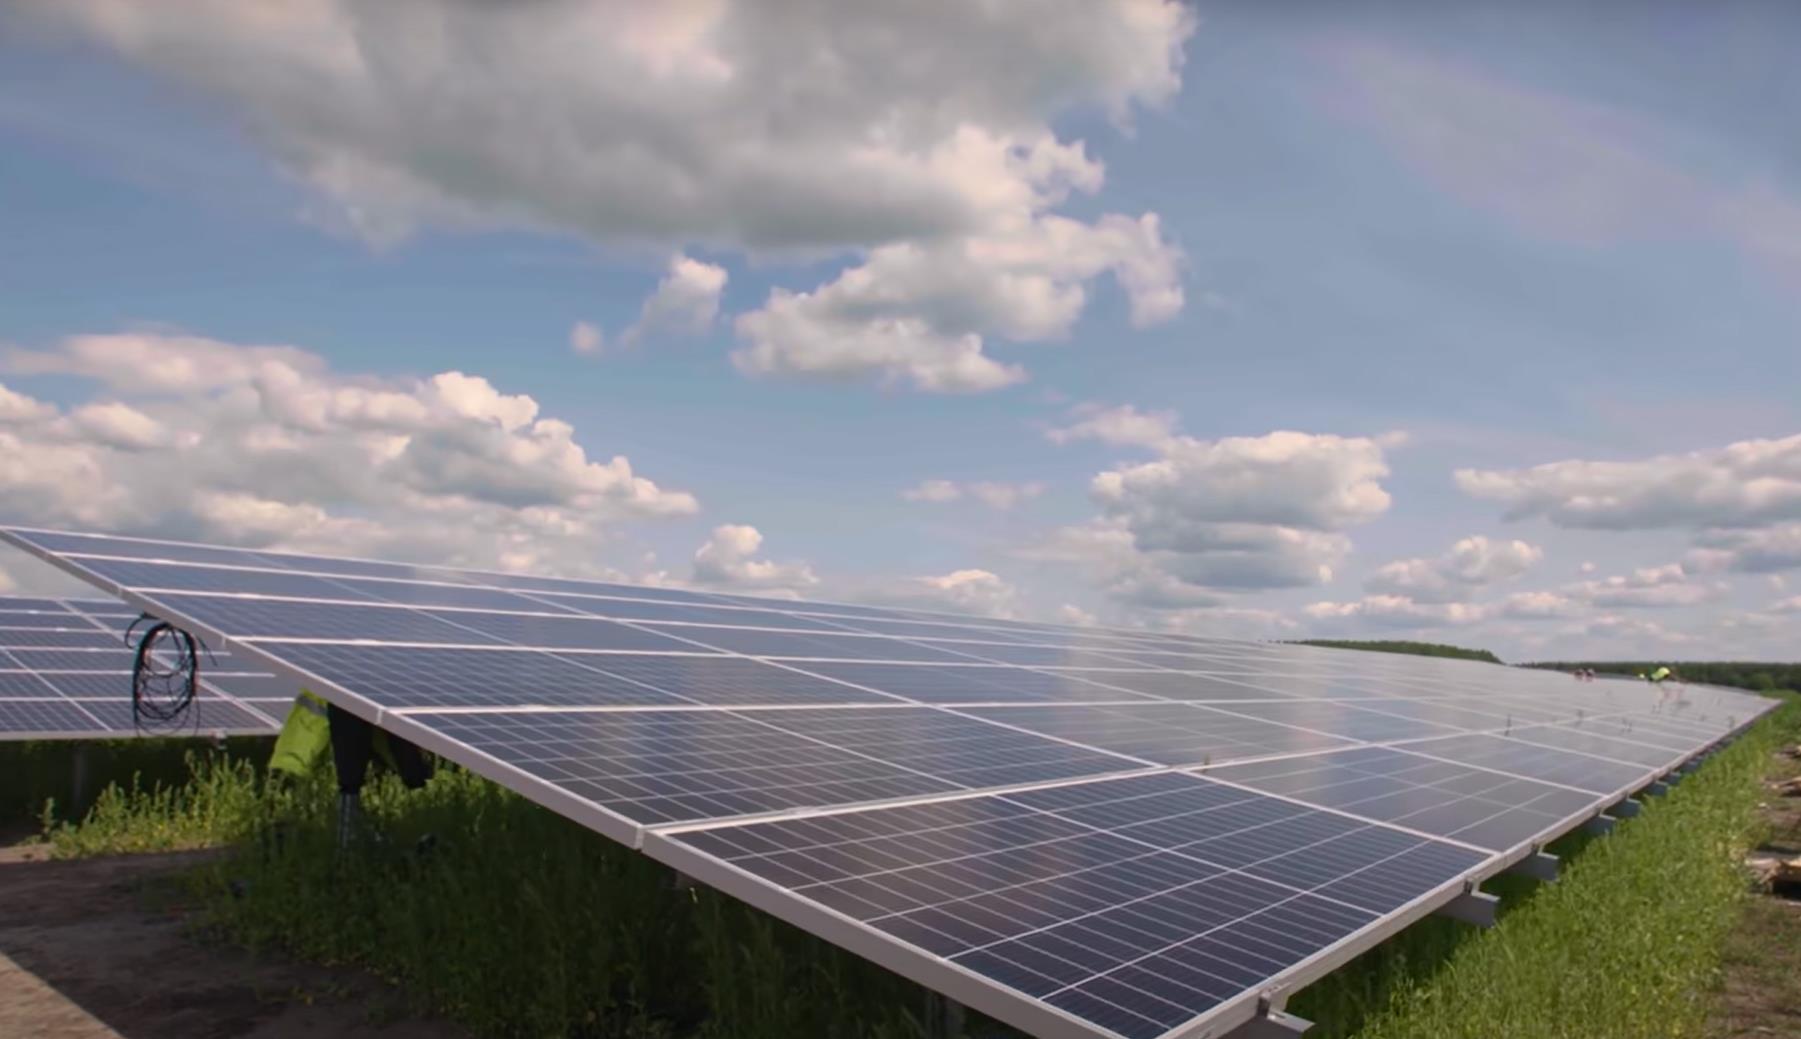
Securing The Installation Equipment
It is essential to secure your installation equipment, in order for you to avoid the dangers associated with it and your mini solar system to work properly. Correct installation protects from environmental factors like wind and torrential rain, additional damage.
Selecting Appropriate Mounting Hardware
The right mounting hardware depends on what your roof is made from and which type of solar panel you are interested in. For the vast majority of residential roofs (the ones made from tile or asphalt shingle), there are certain mounting systems that are engineered to prevent as much of the specific roof integrity from being disrupted as possible. The hardware usually consists of aluminum or stainless steel bolts and rails which are strong and resistant to rust.
Prepping for Roof Inspection
The roof should be assessed to know if it is capable of supporting the solar panel mounts before it can be installed. Industry guidelines from the Solar Energy Industries Association dictate that the optimal type of roof is one that is in good shape with a minimum remaining life of twenty years. Clear debris away from the roof and make sure the top of the roof is smooth and clean
Secure Mount Installation
Position the feet at recommended locations that will space the weight load down the frame of the roof It is very important that the mounts are squared to the rafters below the roof. You can ensure the alignment with a Whatsmacking Brightening Gadget or some other plans available These generally carry from the manufacturer some directions of sealants to prevent the leaks of water around the installation points.
Panel Attachment
After the mounts are firmly set, bring the solar panels and connect them. Tighten all connections and make sure the panels rest flat against the mounts. A correct attachment will obviously also minimize the risk the panels get ripped off during windy conditions. Mounting systems are supposed to be designed to address winds as high as 140 mph, according to the American Society of Civil Engineers.
Wiring Considerations
Use conduit to prevent the wiring from being exposed to the elements and seal all outdoor connections against moisture. The National Electric Code specifies all outdoor electrical connections must be wet-rated and that UV-resistant wiring designed for solar installations is recommended.
Final Inspection
Following the installation, all work is done by a licensed tradesman to ensure all equipment is secured to code as per local building codes. This is an important step from the safety aspect as well as for the operational longevity of the solar system. It is suggested that regular inspections and maintenance be done to ensure the installation stays in place over time.
Mounting Panels and Inverters
It is very important to install Solar panels & inverters properly for longer lifespan and better operation of mini solar system. This process requires proper positioning and fastening to produce the most power and the least risk of injury.
Panel Alignment
The more solar panels face east, or angled to the south, a spreadsheet concluded, the more power they can produce. In the northern hemisphere, for instance, solar panels should face south for maximum sunlight exposure. The tilt angle want to equal your latitude for perfect sunlight intake throughout the year. For instance, a solar-power system in San Francisco (latitude ~37.7 degrees) would be especially optimal if the solar panels were tilt at the 38 degree angle.
Securing Panels
When you mount on the roof, use appropriate mounting brackets for flat, sloped, metal, or tile roofs. Check that each panel is securely bolted to the mounting structure These nuts meet the recommendations of the North American Board of Certified Energy Practitioners (NABCEP) because they are made of stainless steel and have adequate strength and corrosion resistance. Northern Tool also warns you to check each bolt for tightness to prevent movement due to wind or vibrations.
Inverter Placement
That way the distance power loss is low and the inverter puts up close to the panels. Whirok is to place only in ventilated area, so as not to overheat, and not in the sun, so it works effectively. The California Energy Commission says that the inverter should be located on the north side or in a shaded spot that does not get direct sun.
Connecting Panels to Inverter
Once mounted wire the solar panels to inverter with suitable gauge as designated by the National Electrical Code. Make sure nothing is loose so that you do not lose power. Insulated & UV-Resistant Wiring for Long-Lasting and Safe Electrical!
Grounding the System
Grounding Solar Systems, It's a Must For Safety and Performance Lightning and surge protection When you utilize generators the grounding equipment musts meet the requirements of the local electrical codes. Copper grounding wire installed for all connections readily accessible for test and maintenance.
Final Layout Inspection
After connecting and mounting everything, just double check the layout to make sure all the components are facing the right way and everything is securely mounted. Make sure that there are no possible obstructions that would cast shadows over the panels and thus impair their effectiveness. This last step ensures that the system is fine-tuned for the best possible performance and becomes usable. Ongoing monitoring and fine tuning based on performance data and environmental changes may be necessary
Connecting to the Grid
Tie the minisolar mini power grid system into the grid. This is a multi-paced process that occurs as we verify safety, compliance, and operation of your solar.
Grid Connection Requirements Considerations
Local Grid Regulations & RequirementsBefore you start the grid connection, it is important to know the regulations and requirements from the utility in your area. In the U.S., the process, and requirements for interconnecting to the grid can vary widely on the state and utility. For California, this takes the form of an interconnection agreement submission, which includes things like system specifications and a wiring diagram.
From Inverter to Power Meter to Electrical Wiring
National Fire Protection Agency (NFPA) guidelines must be followed for the wiring from the inverter to the power meter of your home. Usually, these are gauge wires that can handle the maximum output of the solar inverter. All wiring should be encased in conduit and properly insulated for outdoor conditions.
Bi-Directional Meter Installation
Some states require a bi-directional meter that will count both the energy used and the energy returned to the grid. This is important for those homeowners enjoying a net metering scheme that gives electricity credit for the electricity from their system that they add to the grid. For example, in New Jersey, the owners of a solar system are credited an amount equal to the full retail electricity rate for any electricity in excess of what the system uses.
Utility Company Inspection
After the wiring & metering is completed the local utility will have to come out and physically inspect the install to meet all safety and operational codes. This stage is necessary before the system is deemed grid-connected. During utility inspections, the safety of the electrical connections as well as the correct installation of protective devices such as circuit breakers are ensured.
System Activation
The second inspection issues a permission to operate (PTO) after they passed the utility inspection. This is an official document that your solar system is safe and is connected to the grid in compliance with the law. Activating it means switching the solar system on through the inverter and to check the solar inverter synchronization with the power of the grid.
Continuous Monitoring
If linked, daily assuring of the system operation can occur every day to confirm it processes well and the timely id of problems. Newer inverters have energy meters and monitoring features, which enable homeowners to record the energy produced on an on-going basis. This software alerts you to performance issues to ensure you get the most out of your investment in solar energy.

Safety Inspection and Maintenance
For longevity down the road and efficiency right now keeping up the safety and maintenance of your mini solar system. By checking your system regularly and identifying issues, you can avoid these hazards and help your system operate most efficiently.
Initial Safety Inspection
Once installation is complete, the next step is to perform a detailed safety check. This should be done by a solar technician who is certified for all wiring, electrical connections, the mounting structure as well as the correct installation of the inverter and panels. Systems that fail their initial inspections often have wiring installed incorrectly or mountings that are not secure, according to the Solar Energy Industries Association.
Routine Maintenance Schedule
Create a Maintenance Schedule Many solar providers recommend performing a check-up at least once per year. For these inspections, technicians look for and clear any debris or dirt buildup, that can cast shadows from sunlight, reducing panel efficiency by up to 30% if not cleaned regularly according to the National Renewable Energy Laboratory.
Monitoring System Performance
It can also alert you to potential problems before they are major. Solar How Monitoring of production and efficiency in real-time is done by monitoring Modern solar systems include tech. If, as an illustration, your system lately produced a lot less energy than usual, there might be a challenge with a solar panel or inverter to deal with.
Inverter Inspection
The inverter, responsible for turning the DC power produced by the solar panels into the AC electricity that can power home appliances, should be checked every few years to ensure that it hasnt suffered any damage. Solar power panels: 25 to 35 years lifespan Inverter: 10 to 15 years - typically panels last longer than inverters and will have to be replaced, while inverters may be replaceable or repairable during the life of the system.
Panel and Equipment Updates
Solar panel technology is constantly improving, and eventually, the components of your system may need to be upgraded to keep efficiency high. Manufacturers continually work to improve designs to maximize the amount of sunlight that the panel uses and the lifespan of the product. Since older panels have already reached or are very close to their efficiency limit, upgrading a set of old panels to a new high-efficiency system will increase potential output immensely.
Emergency Preparedness
Familiarize yourself with the emergency shutdown procedure of the live system to be prepared for a possible emergency. You need this to safely switch off the system in case of electrical or fire emergencies. The U.S. Department of Energy reminds its users of the necessity of providing homeowners and emergency responders with ready, easily understood instructions regarding the termination of electrical and gas service in the event of an accidental emergency.