The Foundation of DIY Solar Panel
Describing how to create a solar panel by explaining their basic working principle and parts is somewhat irrelevant.
By now, it does not need to be mentioned that a solar panel is a construct of photovoltaic cells that recognize sunlight and convert it into electricity. This is done through the photovoltaic effect. Therefore, creating a solar panel from scratch means correctly arranging the cells on the panel, attaching electrical wires to them, and setting them in a waterproof container. The freedom and beauty of this project type lie in the endless variety of its alterations. One could start with a simple panel to charge their phone and end up with a home energy plant. The main disadvantage of DIY solar panels is their scale. Undeniably, creating such a system requires an initial investment, since high-quality solar cells and other modules are not cheap. However, it must be recognized that the project pays off eventually while also contributing to climate preservation. Furthermore, creating smaller panels to power a couple of devices does not cost much and could be a good start.
Photovoltaic Cells Explained in Depth
As was said before, a photovoltaic cell is an object capable of converting sunlight into electricity. Essentially,
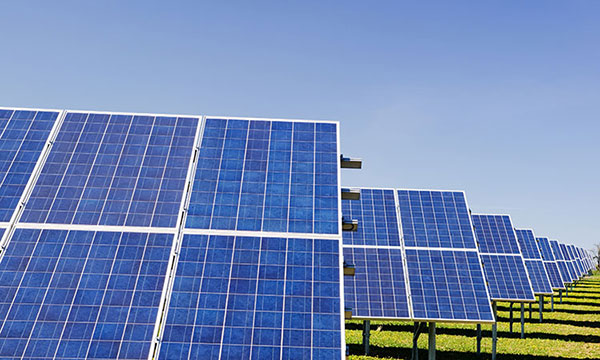
the simplest cells made of silicon convert this sunlight into direct current. The crux of their action is the impact that sun rays have on the matter of the cell, which, in this case, is silicon. Throughout this event, the sun rays electrify the silicon and create current. It has to be mentioned that silicon is not used as a casing material but is turned into an electric hole through. The single cell produces a meager amount of power. As a result, the cells are connected in groups to form a panel. There are two types of PV cells, monocrystalline and polycrystalline silicon cells. Silicon is universally considered the most efficient material for the job. Monocrystalline cells use purer silicon and are, as a result, slightly more effective however, they are also considerably more expensive. All in all, the difference between the two is generally viewed as not being substantial depending on the parameters and space in the owner’s willingness to allot to the project.
From Photovoltaic Cells to Soldering Irons: Creating Solar Panel
Necessary Materials
Before you start building your panel, you should get the right materials and tools. First of all, keep in mind that you have to get a sufficient number of photovoltaic cells. The number and types depend on your power needs. You will also need a good backing material, which may be plywood, metal, or something else. Do not forget to get a clear cover for the panel to prevent your cells from being covered with dirt. You can use plexiglass or something similar.
As for tools, you will need a soldering iron, wire cutters, and safety gear. In addition, you will have to get an appropriate meter to test the voltage and current produced by your panel. Finally, you have to consider getting cables and connectors, as you will have to connect your panel to your electrical system properly. Oftentimes, these may be a charge controller and a battery, among others.
Starter Projects: Do It Like a Pro from Your First Days
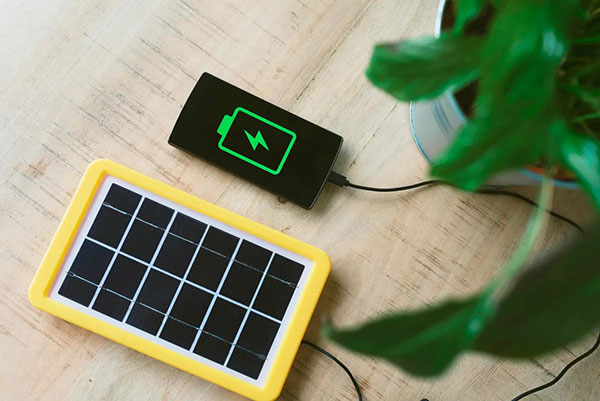
If you are not sure that solar power energy is the right thing for you, you may try some starter projects. One of the best ways to get closer to DIY solar energy is to build a small charger for your smartphone – all you will need is a few cells. If it does not satisfy you, you can create a small panel to illuminate your garden with its lights. As will be revealed later, you will need to connect the cells properly and position your panel carefully to let it get maximum sunlight. Then, when you are more experienced, you will be able to build a more complex system for your shed, your house, and who knows what else.
The key to the amazing DIY solar panel project is careful planning. To build it, you need a lot of patience: after all, the power of the Sun is worth it.
Step-by-Step Process to Building Your Own Panels
Building your own solar panels can be a fun project that gives you a real sense of achievement, not to mention a positive impact on the environment. Here is a fool-proof guide to creating a working solar panel from scratch.
- Make a plan: Determine the power output you wish to have. This will dictate how many photovoltaic cells you will need and of what type. Remember that an average home solar panel is around 250 watts, so scale your project accordingly.
- Collect your materials: You will need PV cells, a backing board, such as plywood, clear polycarbonate or glass, EVA film or silicone for encapsulation, a soldering gun, solder, flux, wire, and diodes.
- Test your cells: Before you start to solder them together, check each PV cell with a multimeter in the sunlight to ensure they are working. This step is crucial to avoid power loss in the final panel.
- Arrange your design: Put your cells in rows and columns to plan the array. The number of cells, as well as the cells’ distance from each other and obliteration from sunlight, influence both the voltage and amperage of the panel. These factors, in turn, determine how the cells will be connected, in series, or in parallel.
- Solder the cells: With a light hand, use the soldering gun to make connection strips between the cells and the wires exactly how you arranged your design. Bad connections will sabotage the panel’s performance.
- Seal: Now assemble your array and encapsulate the cells to shield them from the elements. This can be done using EVA film and a laminator, or with a silicone sealant.
- Mount the cover: Seal in your panel with a sheet of clear polycarbonate or glass to protect it from the weather and physical impact.
- Install the diodes and the wires: Diodes prevent the backward flow of electricity at night. Proper wiring connects your panel to the device or battery, for which it was meant.
- Final testing: Once assembled, take your panel outside on a sunny day and use your multimeter to measure its output. Adjustments will have to be made if the results are not what you expected.

Sourcing Components and Safety Measures
Sourcing quality components is a vital part of ensuring your project’s success. Local hardware stores, online retailers, and specialized solar suppliers are all excellent sources for the materials you will be needing. In the case of PV cells, it is crucial that you acquire them from a supplier you trust – in addition to ensuring the quality of the cells, you will be protecting yourself against potential scams and substandard products.
Safety is also a major concern.
Always wear gloves and safety glasses or goggles to protect yourself against sharp edges, as well as the hot solder. Solder your cells in a well ventilated area to reduce your exposure to the fumes.
Crafting Solar Cell Arrays
Connecting your cells into solar cell arrays is a nontrivial process that requires care and precision. Dry out your cells on the backing board, to give you an idea of what your array is going to look like, and then start soldering the cells in your desired configuration, using flux to aid the flow of the solder. Be sure to keep the soldering iron at a reasonable temperature so as not to accidentally damage the cells. Wiring your cells together in series will increase voltage, while parallel connection increases the amperage – the nature and details of your project will determine which type of connection you will be using.
Sealing and Special Assembly Instructions
The final step is encapsulating your cells and sealing the whole assembly together. If you choose to seal your cells with EVA film, layer the film onto your cells and the clear cover, and then use a solar laminator or a carefully arranged ironing process with protective layers to bond the film to the cells and the cover. For a more crude construction, you can spread silicone encapsulant evenly over your cells and add the cover, then use clips or similar clamps to hold them together until the encapsulant has dried. Either way,
do not neglect to seal all the edges – if moisture gets in, your encapsulant will promote its retention, ultimately leading to failure of your cells.
Pros and Cons of Building Your Own Solar Panels
Going solar for your energy needs is an exhilarating prospect, but building your own solar panels from scratch heightens both the satisfaction and complexity of your adventure. Here are some benefits and costs of DIY solar panel production.
Benefits and Advantages
One of the most significant pros of homemade solar panels is the detailed knowledge they impart about photovoltaic technology and electricity. The expertise that comes with building your own solar network is vital not just for looking after your rig but also for better preparing yourself for power-related disasters. With the skills you accumulate from creating your panels, you’ll be able to fix your system’s kinks and add components for greater lengths of life. Moreover, this knowledge can be directed to help others who hope to undertake a solar panel build of their own.
Similarly, following the process of solar panel construction, whether from scratch or a premade kit, can result in a feeling of accomplishment and success.
This sensation is one of the quickest routes to applications of principles for sustainable living and energy. Engaging in these practices and projects encourages you to think practically to help your life and protect your autonomy.
One of the dangers of designing and manufacturing solar panels on one’s own is the risk of electrical safety hazards. Without taking the proper precautions, and in the absence of the necessary knowledge, one may not only create a fire hazard but also suffer an electric failure. Therefore, before starting to work on the project in question, one is advised to conduct thorough research. Speaking to experts on the subject matter might also be advisable. Additionally, the cost-efficiency factor might carry a range of risks. On the one hand, the prices for the materials seem more than affordable, and purchasing a solar panel seems to be more expensive. However, in the light of the fact that the produced device will be less efficient and more susceptible to degradation, one cannot expect a plethora of cost-efficient effects. More importantly, the durability levels need to be taken into consideration. In isolation to practice in professional manufacturing,
DIY instruments are less likely to be durable than the former since the technologies that are used to design and produce solar panels on a commercial scale include the test for the resistance to harsh weather. Overall, while the prospect of building one’s own solar panel seems very appealing and engaging, the dangers and costs associated with the process should be taken into consideration. For most trainees, a combined approach is recommended, with DIY becoming an opportunity to learn and a chance to use professional instruments for the most critical part of the project.