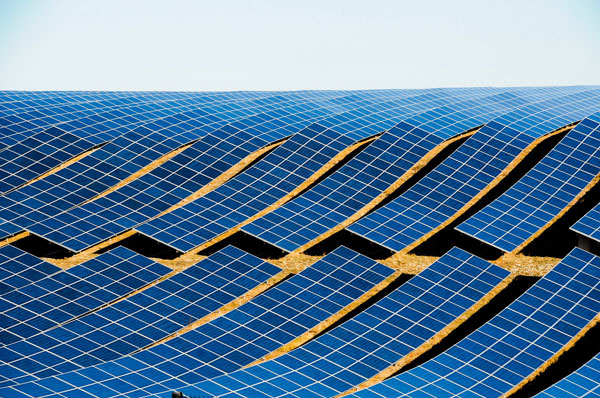
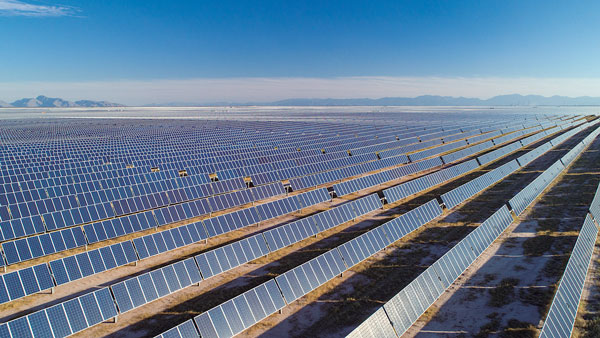
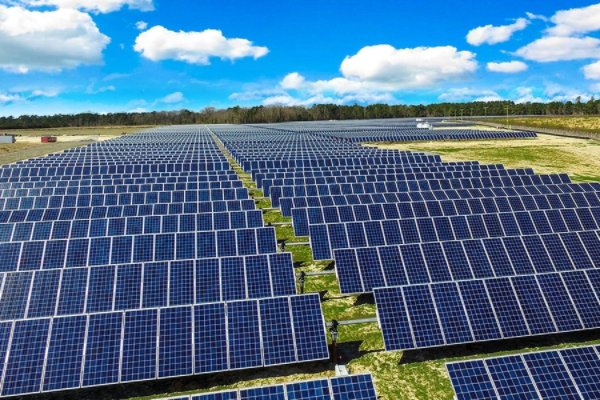
Site Assessment
Before discussing the installation process, site assessment is essential for a successful and efficient project. This is particularly important for monocrystalline solar panels, which require specific conditions. Each of the steps is as follows:
Determine Solar Potential
Evaluate Sun Exposure: Use solar irradiance maps, sun path calculators, and other tools to determine how the sun shines on the site at different times of the year. Avoid shade from other buildings, trees, and adjacent structures to ensure that as much sunlight as possible reaches the panels.
Analyze the Roof Structure: Assess its type, angle, and material to ensure that the roof is able to support solar panels. Moreover, consider the orientation — most residential systems perform best when they are facing due south. Finally, account for any additional structural improvements that might be required during installation.
Assess Energy Needs
Energy Consumption Analysis: Understand energy usage patterns and pinpoint the period when it peaks. With a better understanding of the electricity consumption, it is possible to calculate the required number of solar panels.
Future Growth: Do not forget to account for the changes in the household’s energy consumption. For example, a new oven, pool, dishwasher, or a garage may be added. Solar systems are scalable and can be easily expanded.
Regulatory Compliance
Permitting Requirements: Look up local building codes and apply for a permit. Navigate zoning restrictions and rules of a neighborhood association when located within one.
Utility Interconnection: Ensure the utility is part of the net metering arrangement, which may require a fee to connect to the grid.
Financial Analysis
Cost-Benefit Analysis: Calculate the total cost of ownership, which includes the installation and maintenance costs. Divide the initial price by the savings on the utility bill to determine the payback period and the total return on investment.
Incentives and Rebates: Take advantage of the federal solar tax credit, state rebate, SRECs, or any other utility incentives that lower the entry price.
Environmental Considerations
Environmental Impact Assessment: Calculate the reduction in carbon and other greenhouse gas emission, as well as air pollution and dependence on fossil fuels. Sustainability is a long-term consideration and the transition must be environmentally-friendly.
End-of-Life Planning: Find a recycling program in your state or a facility that takes solar panels. The materials used are valuable and should not be discarded.
Safety and Security
Safety Protocols: Follow the industry’s best practices and standards. Installers should receive adequate training and all precautions must be taken. Adhere to personal protective equipment and electrical safety guidelines.
Security Measures: Install tamper-proof components and a security camera system to prevent stealing. This may include motion sensors or alarms.

Installation Preparation
Although preparations are usually ignored redder than the installment of monocrystalline solar panels , they should not be underestimated.:
Site assessment
- Evaluate Roof : The first step is to evaluate the roof structure. Check the roof for leaks, rot, or cracks. If some of the problems are detected, they need to be fixed before the installation of the solar panel. Estimate whether the roof can endure a large amount of weight. Be sure if the roof is prepared for the installment, will warranty be violated?
- Confirm Sun Exposure : Install special solar modeling tools to identify how much sunlight the site where the solar panel should be put receives, or visit solar experts. If there are tall trees or tall buildings near the site, do not expect that sun exposure data will be desirable. All solar panels need straight sun exposure because only this condition yields a high level of energy.
- Stamp of Electrical system : estimate capacity of the electrical system and consider whether it will be able to suffice for a new energy generation or the system should be upgraded. It is vital also to check whether the chosen solar inverters are compatible with the existing inverter system. Be safe obtain any required store permits before installing the new PV system and check whether it fits with local electrical codes.
Obtaining necessary permits
- Research Local Regulations : check comprehensive local building codes, zoning ordinance, and system permits which possess the right to oversee the photovoltaic installation. Pay attention to the changes in regulation. It will ensure the possibility to get along with the project. Decide whether the site owning is jointly possessed, if so, get approval from all the owners.
Order of Actions
Measure and evaluate the roof: Conduct an initial assessment to determine the available roof space and evaluate the feasibility of solar installation. Calculate the slope, orientation, and shading of the roof and identify any obstructions that may affect the project. Confirm that the structural integrity of the roof can support the additional weight of the solar panels. Take measurements and create a detailed plan to facilitate the ordering and installation of the panels.
Secure permissions and permits: Obtain the necessary permits and permissions from the relevant authorities or property managers to commence the solar panel installation process. This includes building permits, electrical permits, and approvals for grid connection, structural modification, or roof access. Follow the established timelines and procedures for acquiring the required permissions and ensure compliance with all regulations and safety standards.
Procure materials and equipment:
Order solar panels: Work with suppliers or manufacturers to purchase high-quality solar panels that meet the specifications of the project. Consider factors such as efficiency, durability, and warranty coverage when selecting the panels. Order them in advance and confirm delivery timelines to prevent delays in the installation schedule.
Collect installation equipment: Create a list of all tools and equipment required for the installation process. This includes mounting hardware, rails, brackets, wiring, connectors, junction boxes, and safety gear such as harnesses, helmets, and fall protection systems. Verify the availability and condition of all equipment before proceeding with the installation.
Prepare work area:
Clear the roof space: Clean the roof surface and remove any debris, vegetation, or other obstructions that may hinder the installation process. Ensure that the roof is free of clutter and properly cleaned to facilitate a clean and stable work environment for the installation crew. Be mindful of the roof membrane and underlying structure to prevent damage during the preparation process.
Set safety measures: Ensure the safety of the workers by implementing robust safety measures and protocols on the work site. Set up temporary guardrails, edge protection systems, and anchor points to prevent falls and accidents. Conduct safety briefings and training sessions for all installation personnel to promote a safety-aware work culture.
Coordinate with Utility Company
-
Submit Interconnection Application : Complete the first step for grid interconnection by submitting an application to the utility company. Provide all specifications of the solar panel system, such as size, capacity, location details, which are required to be attached, etc. Ensure smooth coordination with the utility company for a quicker decision.
-
Schedule Meter Installation : Consult with the utility company for the installation of a bi-directional meter or net metering system. This meter can measure the flow of electricity through the solar panel and grid and would be used for billing and crediting for surplus power able to produce.
Develop Installation Plan
-
Layout Design : After purchasing the panels, prepare a customized design and layout of the panel keeping the space and your experimentation ideas into account. You can approach some design professionals or engineers for getting professionally designed layouts to get expected results.
-
Sequence of Tasks : Prepare a well-thought-out plan for the sequence of tasks, milestones, and clarifications required for the successful installation of solar panel systems. Assign the role of the team and contractors in starts and finishing of every phase of installation and ensure timely completion of the project. Also, remember the limit of the work above which you would require the help of a professional for working.
Panel Preparation
To properly install monocrystalline solar panels, it is necessary to adequately prepare such panels for their best performance and life span. So, here are the detailed procedures to follow:
Unpacking and Inspection:
Remove the Panels: Carefully take monocrystalline solar panels out of the box, making sure no part is missing and no damage has been done to individual parts during transportation. Remember that any scratch or dent can seriously damage panels.
Check for Defects: Carefully check the monocrystalline solar panels for any defect that may have resulted from the manufacturing process. Pay attention to such specific conditions as cracks, chips, or delamination of the panel, defects of the frame, glass surface, and the j-box of such panels . It is also important to verify that the performance and security of panels will not suffer from any type of defect.
Verify the Specs: The next important step of the procedure is to make sure that the specifications for the monocrystalline solar panels to be installed match the specifications of the actual panels. Make sure the panels are the wattage, voltage, and the size they are supposed to be according to the size of the mounting systems and the electrical specs of the overall installation.
Cleaning and Preparation:
Wash the Surface: Clean the surface of the monocrystalline solar panels using a mild soap solution and a sponge or soft cloth. everything you need to know about solar energy . Do not scratch the panels using an abrasive material or damage the surface with a too strong chemical material.
Rinse the Panels: Clean with clear water to remove any soap or other cleaning solution, wiping the residue off the panels. Allow the panels to dry completely to avoid any wet spots or streaks which can affect the absorption of the sunlight on the panels.
Check the Mounting Holes of the Panels: Finally, make sure that the mounting holes or then mounting brackets on the back of each panel are clean and not obstructed by anything. Make sure that the mounting brackets on all panels are properly aligned and all panels contain unobstructed mounting points.
Electrical Connections:
- Inspect Junction Box: Open the junction box on the back side of each panel, and inspect the integrity and tightness of the wiring connections. The terminals should be clean and free of any corrosion or oxidation, which would act as an insulator and will prevent electric conduction.
- Check Cable Length: The length of the cable that is attached to each panel should be measured. It must be long enough to reach the connecting location to the solar array. Check the gauge of the cable and insulation rating; they should be able to carry the maximum current and voltage output of the panel. If they comply, label the cable.
- Labeling: Label each of the cables and panels with a unique identifier: the serial number of the manufacturer. Keep record of these numbers.
Quality Assurance:
- Perform Performance Testing: Have a sample of the panels tested for their output under standard operating conditions. Use a solar irradiance meter or some other means of measuring the output to measure the open circuit voltage, the I-V characteristics and the output power of each panel.
- Document Results: Write down the results of the testing and the serial numbers of the corresponding panels, the conditions in which the testing was done, the voltage, the current and the power output for each of the panels. Compare these with the manufacturer specification sheet to determine whether they are all right.
- Action to Be Taken: In case some of the panels do not comply, have the manufacturer or the supplier contacted to arrange for a replacement. The instructions should be followed as to the way it should be returned and to how the warranty would be claimed. Any defects observed should be noted.
Wiring and Connections
In order to work and produce electricity, monocrystalline solar panels need to be wired and connected properly so that maximum energy can be delivered. Here is a detailed instruction that can help in properly wiring and connecting:
Prepare Electrical Components
- Material collection : collect all the materials, including the cables, junction boxes, connectors, and combiner boxes that will be necessary for connecting monocrystalline solar panels. Make sure to use cables that are rated outdoor and can handle the maximum current and voltage requirements put on the solar array.
- Inspection : the engineer must provide a detailed inspection for each element used in the wiring and connection to make sure they are not damaged. The engineer must ensure that all the connections are tight, and the insulation is on. In addition, the protective covers should be mechanically perfect. If any of the components is damaged, replace the component and ensure all the components are fine.
Determine the Wiring Configuration
- Series vs parallel connection : depending on the desired voltage, the engineer can decide either to use series wiring to connect all the units in the solar array or parallel wiring to connect all the components from the solar array to the inverter and inverter to the electrical panel in the house. When a series connection is used, the voltage is increased. However, when a parallel connection is used, the current is increased. This may be counterintuitive but the engineer should work with informed people or a solar installation engineer to decide which type of connection to use.
Connect Solar Panels
- Position Panels: Position monocrystalline solar panels as per your layout plan, making sure the orientation and spacing between them is as per the plan. Make sure the panels are mounted securely to the mounting structure with the help of mounting brackets or rails.
- Connect Positive and Negative Leads: Using appropriate connectors, make the electric connections between the positive and negative leads of the adjacent panels. Install the connectors as per the maufactruers specifications and torque them to the maufacturer’s provided specifications for proper contact and conductivity, thus ensuring there is not leakage at the contacts. Secure the connection with water proofing seal or cable tie. Perform a visual inspection at the connections to make sure every screw or nut in the connectors is not loose and at its place.
Install Combiner Box
- Mounting Location: Decide the location of the combiner box, which is generally as near as possible to the solar array and easy access location to the main electrical panel. The location needs to have proper ventilation and protection from environmental factors.
- Connect Solar Cables: Run he solar cables from each string of panels to the combiner box while for proper organization and labeling to facilitate easy troubleshooting and maintenance. No connect the cables to the proper lug inside the combiner box as per the provided diagram by the manufacturer.
- Grounding: The combiner box needs to be properly grounded as per local electric code. The grounding of the combiner box should have proper connetion to the grounding electrode system with lug or terminal provided for the same.
Verify Connections
- Continuity Test: Use a multimeter to check continuity between the positive and negative connections of each panel . Repeated tests for the panels on the supports can be performed to ensure there is continuity between the panels and the junction or combiner box.
- Voltage Test: The voltage test can also be done by the multimeter or a suitable voltmeter. Here one measures the output potential difference between the wires coming from the power generated point with respect to the negative charge. If the output voltage is lower than the rated voltage of a given panel, then you can conclude that something has gone wrong during mounting or there is a disconnection .
Finalize Wiring Setup
- Route Cables: One should now route the cable from the point the panels are mounted to the main electrical panel or the inverter. Locate the most suitable pathway while reducing the size and shapes of the cable as you mount them carefully fixed with the cable clips. Remove any hanging section of the cable as you put them through a conduit.
- Make Connections: The final connection to the main electrical panel or the inverter should be made. Here, one respect the polarity rule and given torque parameters to avoid overheating or falling out.
- Labeling: All electrical components electrodes junctions, cables and end points should be labelled or tied with a rope to avoid any future confusion or injury. Mark the ropes with respect with the section of aerial string . Mark it with a number, the circuit number or name and the location of the other electrode or the disconnect its connected with.
Final Inspection and Testing
In the process of commissioning a monocrystalline solar panel system, a final inspection and testing process is required to ensure its proper installation and functionality. Below are the steps required to carry out a comprehensive final inspection and testing:
Visual Inspection:
-
Check Panel Alignment: Ensure that each monocrystalline solar panel is aligned correctly according to the layout plan. Confirm that the panels are properly oriented and there are no gaps between them that violate the proper alignment.
-
Inspect Mounting System: The mounting brackets, rails, and fasteners should be inspected for secure attachment to the roof or ground mounting structure. Verify the absence of corrosion, loosening, or other damages to the mounting system that may cause the panels to be unstable.
-
Review Wiring Connections: Inspect all electrical connections, junction boxes, and conduits and confirm correct routing and secure attachment. Check for exposed or faulty wiring and ensure that all connections are properly secured.
Electrical Testing
-
Open-Circuit Voltage Test: Use a multimeter to measure the open-circuit voltage of each monocrystalline solar panel at STC. Compare the measurement with the rated voltage of the solar panel to ensure that it falls within the acceptable range.
-
Short-Circuit Current Measurement: Measure the short-circuit current of the solar panel to find its output under maximum load conditions. Calculate the power output by each panel using the measured voltage and current to determine if it complies with the specification.
-
Insulation Resistance Test: Measure the insulation resistance of the solar array to determine the integrity of the electrical insulation. Ensure that the insulation tester properly reads the insulation resistance of the panel lead cables and has satisfied the requirements of megohmmeter measurement.
Performance Verification:
- Irradiance Test : To conduct this test, you can measure the solar irradiance at the location using either the pyranometer or the irradiance meter and other such devices to determine the sunlight intensity to reach panels. Then comparing whether the irradiance level you have measured are consistent with your expected values from the location and time of the year.
- Temperature Coefficient Test: To conduct this you would need to evaluate the temperature coefficient of the monocrystalline solar panels. This test is conducted by observing the panels in different temperatures. The change in the power that is relative to the changes in the temperatures allows one to obtain whether the product is stable and efficient or not.
Shadow Analysis:
- This test will allow one to identify whether shading is a problem for the solar region or not for you to conduct this test, you can use prepares shading analysis tool. From this tool, you can simulate the shade from the immediate objects and learn about the effect it will have on the solar power generation.
Documentation and Compliance:
- Record Test Result: All results of the test should be documented. Details for the panels to be tested and all other such equipment that would be needed are groups, then it is recorded, so that it will be easier to reference these in the future in case of mistakes and when tests are needed.
- Compliance Verification: You should verify whether the system is compliant with the local rules, building codes and other safeties and regulations and standards that govern the installations of the solar panels. Electrical work should comply with the NEC . All added safety devices such as disconnect switch must be both OSHA compliant as well as NEC compliant. Any required step for the OSHA and the installation of the NEC should also be conducted and followed.
System Commissioning:
-
Grid connection: Coordinate with the utility company to connect the solar panel system on the electrical grid. Make sure proper synchronization and system commissioning are carried out to ensure seamless integration and grid stability.
-
Functional testing: Conduct a final functional test of the entire solar panel system to validate its operation and performance. Monitor several parameters such as energy production, voltage, and efficiency of the whole system under realistic conditions to ensure that it is reliable and effective.
-
Training the user: Instruct the system owner or its operator how to effectively monitor and maintain the whole solar panel system. In particular, communicate the safety rules, techniques for system troubleshooting, and different maintenance operations that the users have to carry out on a regular basis to enhance the performance of the system and extend its lifespan.